Deploy Bitwarden on Self-Managed Server
Last updated on 2022-02-11, Fri, 06:42 PM
Upd:
Recently, volunteers have contributed a lot of fundamental content to the wiki of vaultwarden.
It’s more comprehensive, and covers almost every occasion you might have to handle.
Foreword & Reference
I used to store my passwords in plain text files on my own devices.
Each time when I forgot my credential, I have to open the lock and copy the key value. Too dangerous in many aspects.
I don’t know how to find a trustworthy host to store them and I was unwilling to use password managers then. Some Tech giants, like Google and Apple, provide simple password management for their users. Obviously, that’s nothing of reliability. Besides, I am reluctant to trust paid services like 1password, LastPass or other proprietary ones, either.
Then I happened to know Bitwarden from ous50‘s introduction.
It is open-source, which caters to me. In other words, I can deploy my own password manager on my own host. Though it provides managed services too, I would rather do this by myself.
Luckily, there are plenty of tutorials about this. As for me, I took one written by ous50.
Here is his article. You can have most of my contents here from his article.
https://blog.ous50.moe/2021/03/12/vaultwarden%E6%90%AD%E5%BB%BA/
I am not gonna deploy native Bitwarden server, but one alternative implementation written in Rust, vaultwarden, formerly known as bitwarden_rs. It enables all premium features like TOTP, which is an important 2FA method.
Prerequisites
- A Linux server, with at least 200MiB spared RAM and 1GiB disk space.
- A valid domain. (Here I use
bitwarden.example.comas an example. Remember to replace with your own.)
If you want to build the docker image by yourself, you’d better have more than 500MiB spared RAM and at least 5GiB free space on your disk.
Install Dependencies
It’s required to install some packages beforehand.
You will need nginx and docker in this case.
Of course, a text editor too. Install as you like.
Debian
sudo apt install dockerIn order to get the stream_ssl_preread module installed by default, we need nginx version higher than 1.19.2[1].
Add the NGINX Official repository to apt, and then you can keep # updated on the latest mainline version.
wget https://nginx.org/keys/nginx_signing.key
apt-key add nginx_signing.key
echo "deb https://nginx.org/packages/mainline/debian/ buster nginx" >> /etc/apt/sources.list
echo "deb-src https://nginx.org/packages/mainline/debian/ buster nginx" >> /etc/apt/sources.list
apt update
apt install nginx -y
Arch Linux
sudo pacman -S nginx dockerSet up Firewall Rule & TLS Security
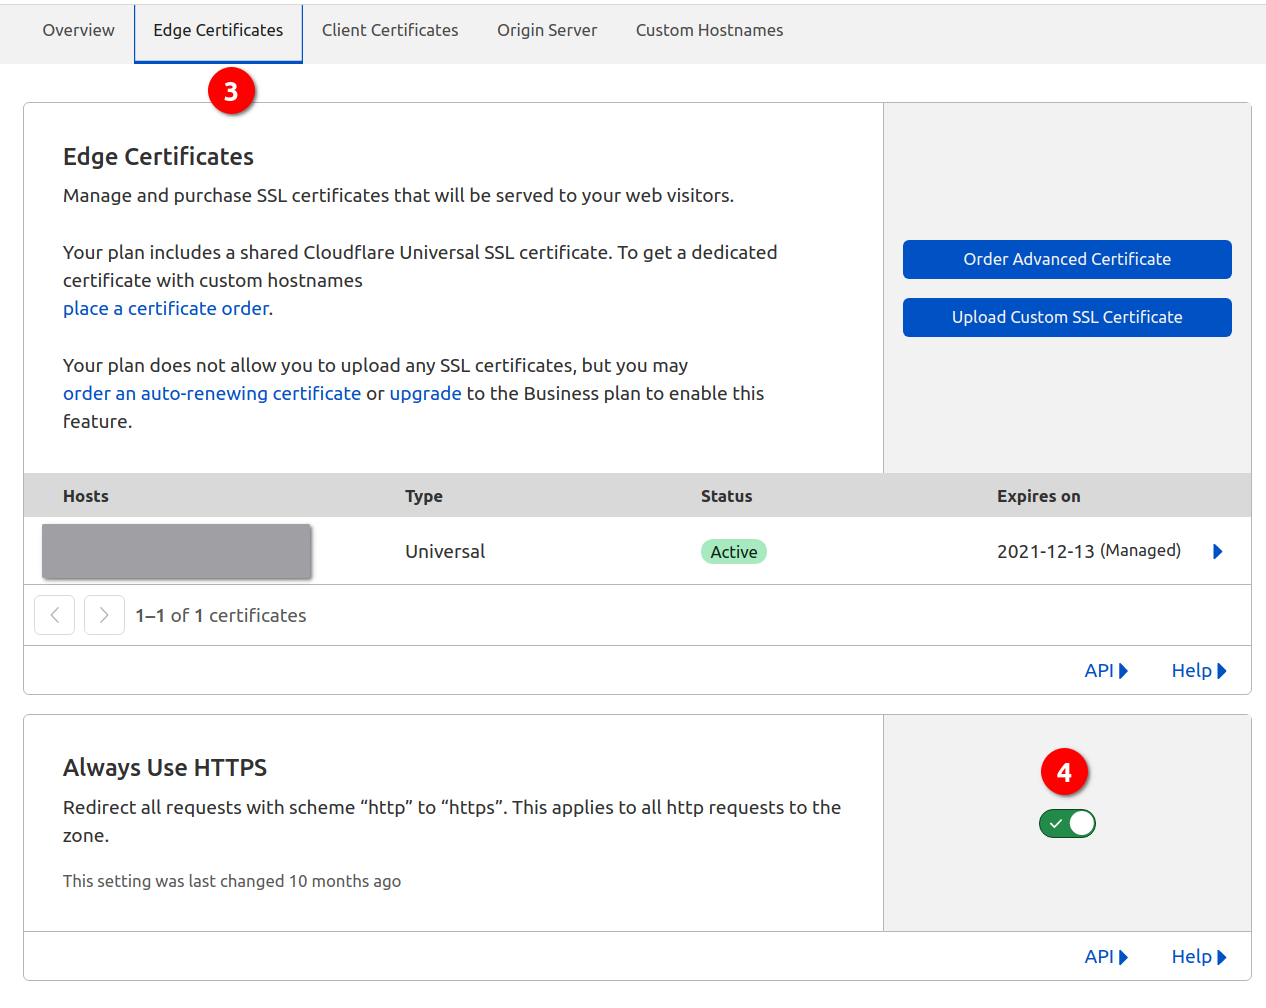
Get your SSL cert before this.
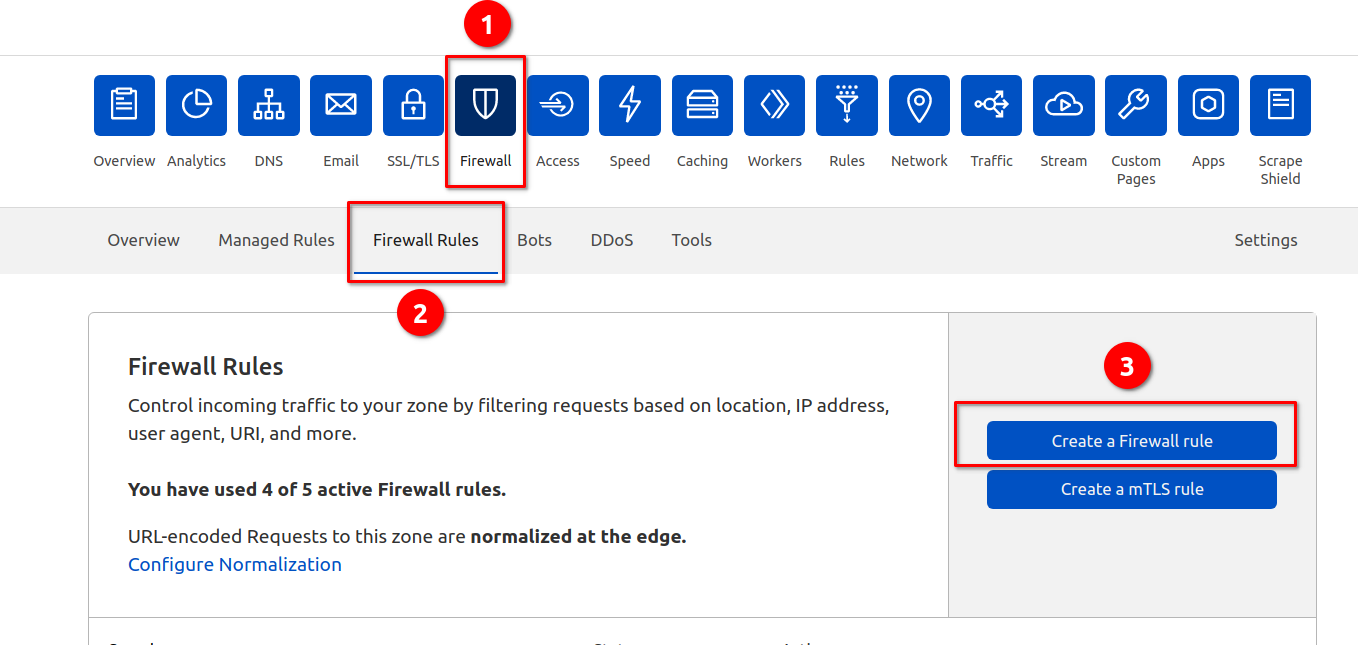
Firewall
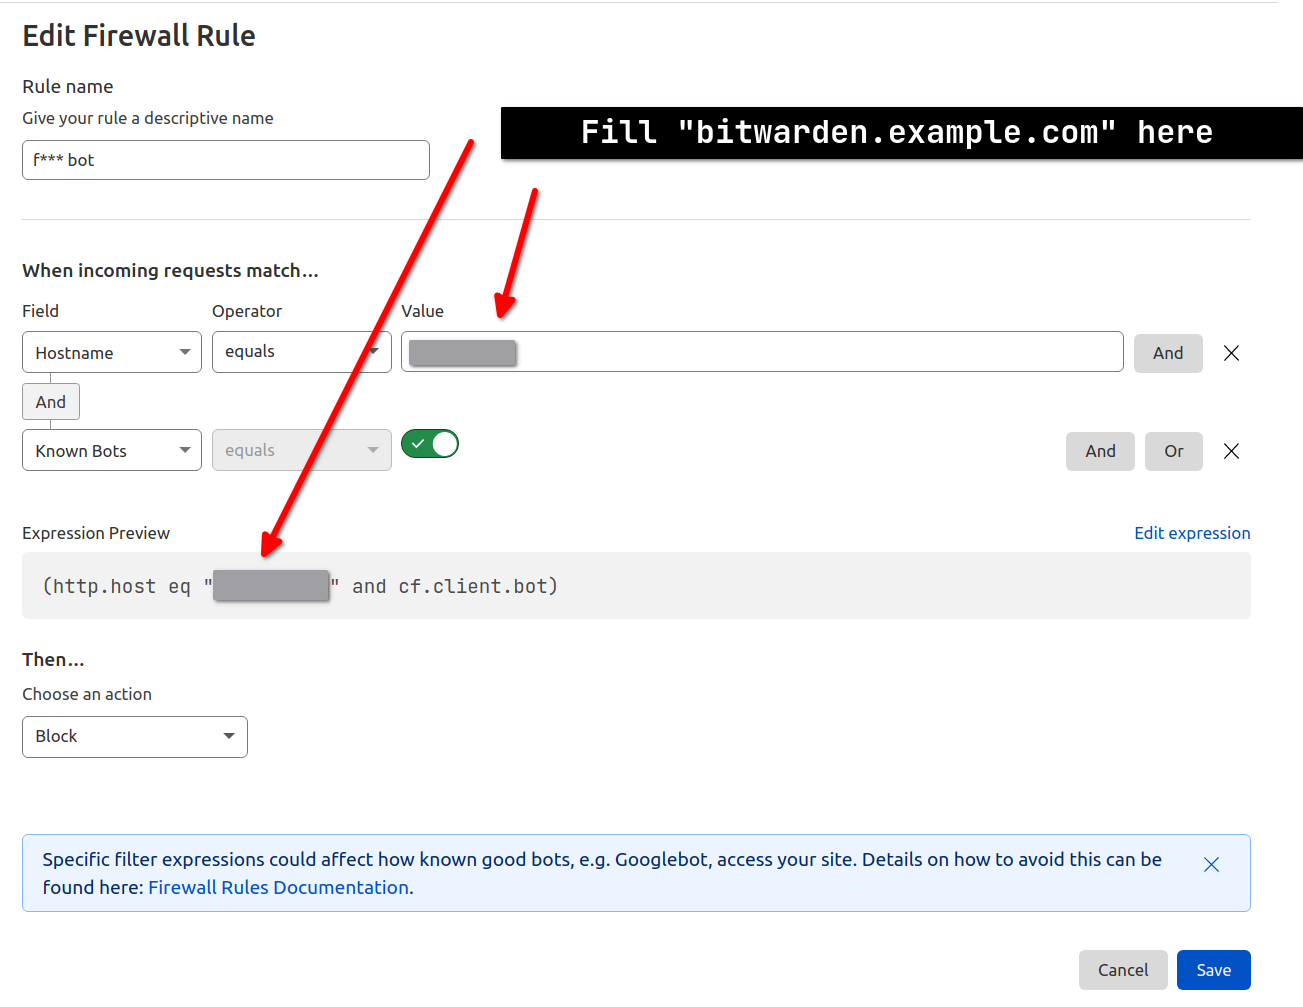
Set up a firewall rule like this to block bots.
TLS
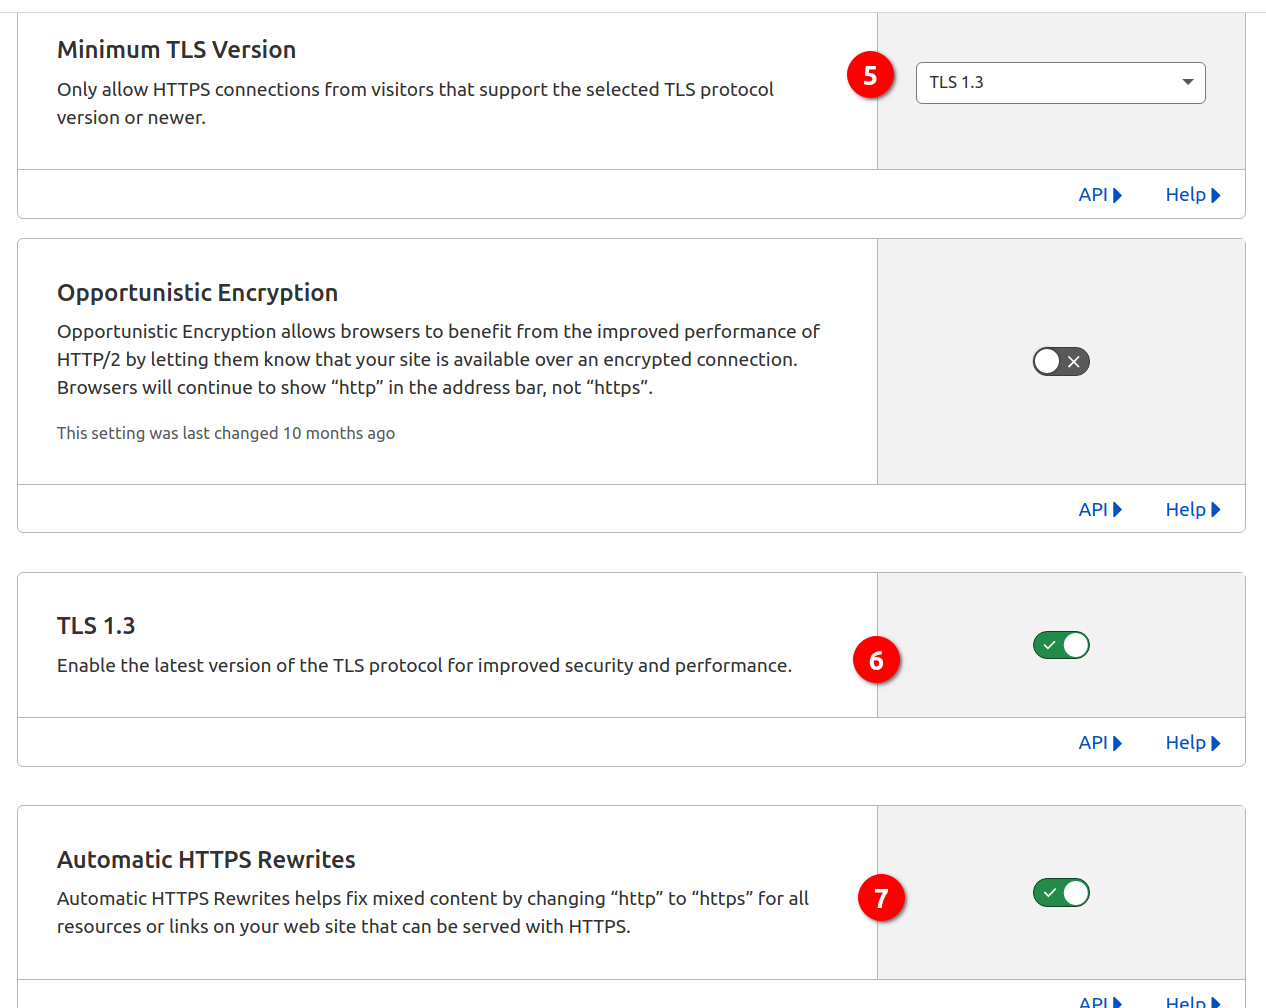
Then strengthen TLS Security like this. Switch on all available enhancements.
(Optional) Make TLS 1.3 the minimum supported TLS version.

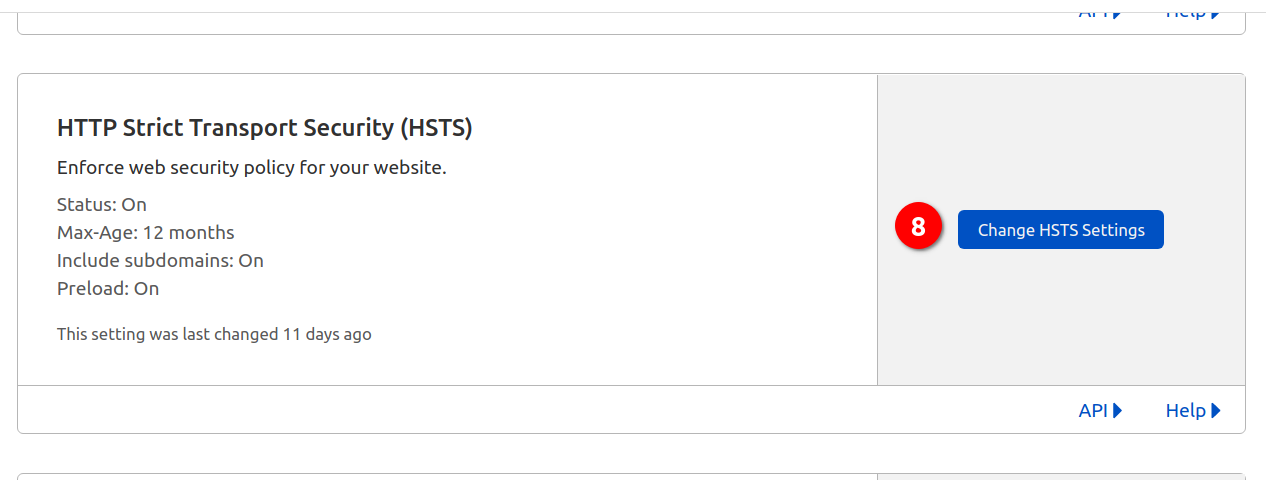
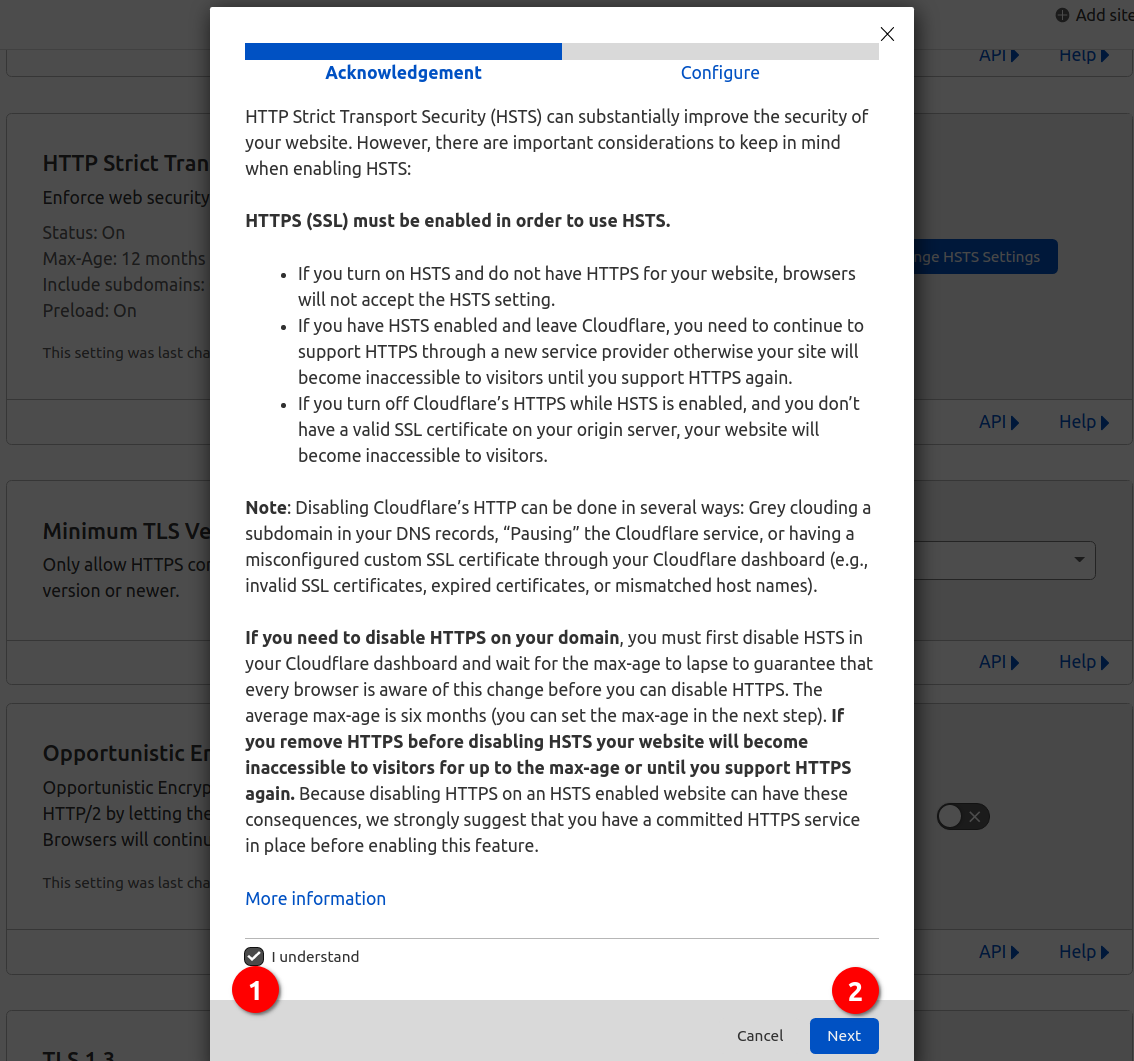
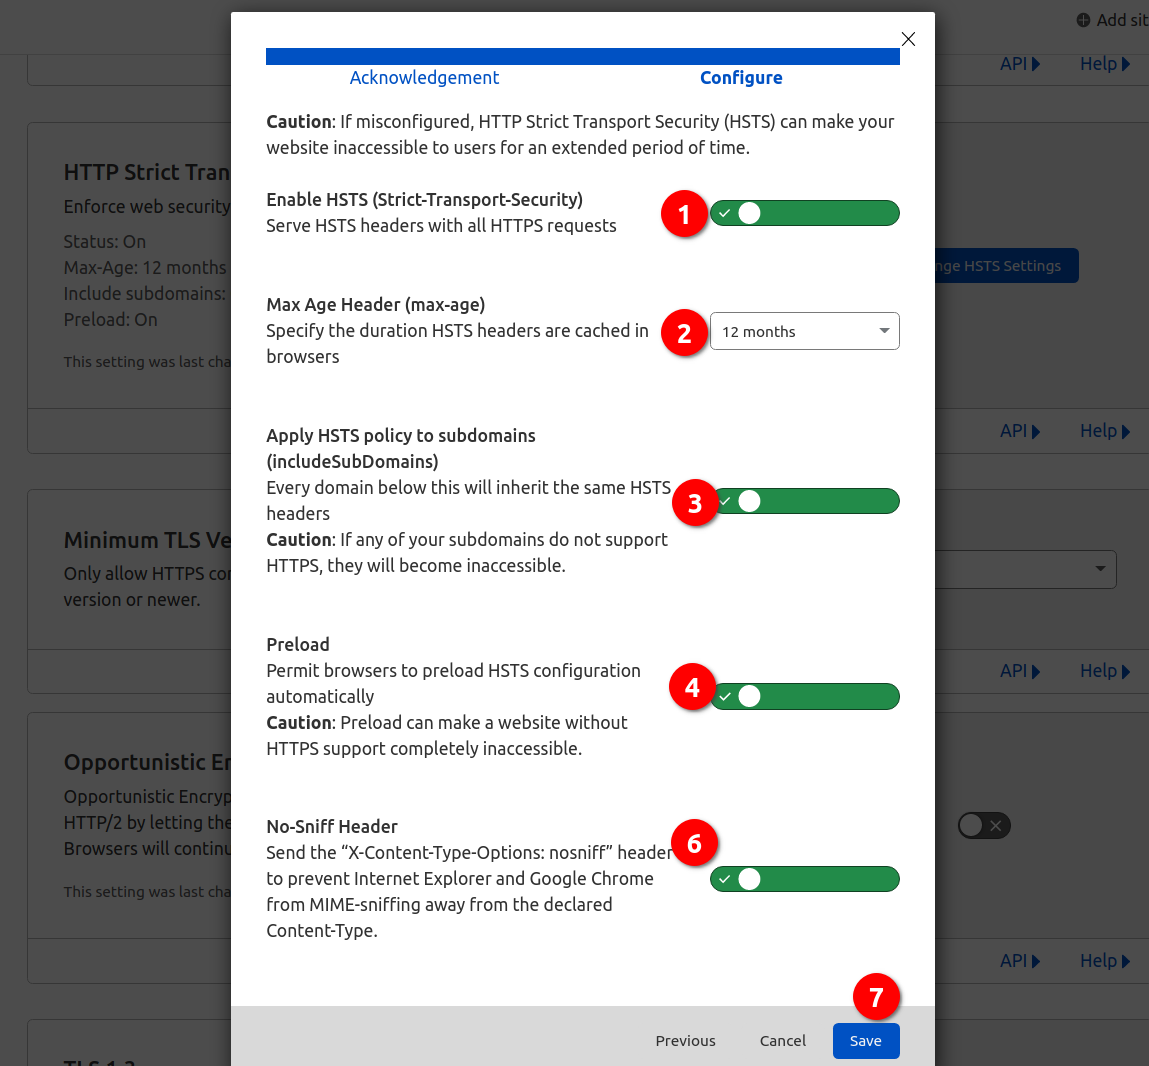
Switch on HSTS
I think HSTS is a little complex, so I did it after some other one-key swtch settings.
Configure Reverse Proxy
Here I use nginx. It’s the same to use apache or caddy, if you are more familiar with that.
If you have other services that listens on port 443, you may need to reuse the port. If your 443 port is free, you can just add a simple server then.
Use Port 443
You can employ stream module to reuse the port, and add a server property.
stream {
    map $ssl_preread_server_name $name {
       sub1.example.com svc1;
       sub2.example.com svc2;
       bitwarden.example.com bw;
    }
    upstream svc1 {
        server 127.0.0.1:PORT_TO_USE_1;
    }
    upstream svc2 {
        server 127.0.0.1:PORT_TO_USE_2;
    }
    upstream bw {
        server 127.0.0.1:PORT_FOR_BW;
    }
    server {
        listen 443 reuseport;
        listen [::]:443 reuseport;
        proxy_pass	$name;
        ssl_preread on;
    }
}
server {
listen 127.0.0.1:PORT_FOR_BW; ssl http2;
server_name bitwarden.example.com;
Or just add a new server property and listen on port 443.
server {
    listen      443 ssl http2;
    listen [::]:443 ssl http2;
    server_name  bitwarden.example.com;
Other Server Properties
Check the hostname of the request so that nobody could access the site via IP directly. This prevents cert mismatch issues.
Remember to block spider bots.
Moreover, keep an eye on the paths of the cert and the key.
In this case, routing for websocket connections are configured for so-called “Websocket Notification“. The port of the proxy_pass can be set as you like. It’s better to listen on localhost.
        if ($http_user_agent ~* "qihoobot|Baiduspider|Googlebot|Googlebot-Mobile|Googlebot-Image|Mediapartners-Google|Adsbot-Google|Feedfetcher-Google|Yahoo! Slurp|Yahoo! Slurp China|YoudaoBot|Sosospider|Sogou spider|Sogou web spider|MSNBot|ia_archiver|Tomato Bot|^$") {
            return 404;
        }
        # Block Direct Access via IP
        if ($host != "bitwarden.example.com") {
            return 404;
        }
        # HSTS
        add_header Strict-Transport-Security "max-age=31536000; includeSubDomains" always;

        ssl_certificate /etc/nginx/ssl/bitwarden.example.com_ecc/fullchain.cer;
        ssl_certificate_key /etc/nginx/ssl/bitwarden.example.com_ecc/bitwarden.example.com.key;

        keepalive_timeout   70;

        # OCSP stapling
        ssl_stapling        on;
        ssl_stapling_verify on;
        resolver 1.1.1.1; ## DNS

        ssl_protocols TLSv1.3;
#       ssl_ciphers TLS13-CHACHA20-POLY1305-SHA256:TLS13-AES-256-GCM-SHA384:TLS13-AES-128-GCM-SHA256;
        ssl_prefer_server_ciphers on;

        location / {
            proxy_set_header Host $host;
            proxy_set_header X-Real-IP $remote_addr;
            proxy_set_header X-Forwarded-For $proxy_add_x_forwarded_for;
            proxy_set_header X-Forwarded-Proto $scheme;
            # proxy_set_header X-Forwarded-Port $server_port;
            proxy_pass http://localhost:8080;
        }

        location /notifications/hub {
            proxy_set_header Upgrade $http_upgrade;
            proxy_set_header Connection $http_connection;
            proxy_set_header X-Real-IP $remote_addr;
            proxy_pass http://localhost:3012;
        }

        location /notifications/hub/negotiate {
            proxy_set_header Host $host;
            proxy_set_header X-Real-IP $remote_addr;
            proxy_set_header X-Forwarded-For $proxy_add_x_forwarded_for;
            proxy_set_header X-Forwarded-Proto $scheme;
            proxy_pass http://localhost:8080;
        }

        # Optionally add extra authentication besides the ADMIN_TOKEN
        # If you don't want this, leave this part out
        location /admin {
            # See: https://docs.nginx.com/nginx/admin-guide/security-controls/configuring-http-basic-authentication/
            auth_basic "Private";
            auth_basic_user_file /etc/nginx/bwauth;

            proxy_set_header Host $host;
            proxy_set_header X-Real-IP $remote_addr;
            proxy_set_header X-Forwarded-For $proxy_add_x_forwarded_for;
            proxy_set_header X-Forwarded-Proto $scheme;
            proxy_pass http://localhost:8080;
        }
    }
After you have finished configuring, remember to (re)start the service.
sudo systemctl enable --now nginxsudo systemctl reload nginx --forcePrepare Docker
Simply pull pre-built docker image and run it.
Add environment variable ADMIN_TOKEN so that you can manage it on https://bitwarden.example.com/admin
Make the token as long and random as possible to fight brute force.
sudo docker pull vaultwarden/server:latest

sudo docker run -d \
  --name=vaultwarden \
   -e WEBSOCKET_ENABLED=true \
   -e ADMIN_TOKEN='xxxxxxxxxxxxxxxxxxxxxxxxxxxxxxxxxxxxxxxxxxxxxxxxxxxxxxxxxxxxxxxxxxxxxxxxxxxxxxxxxxxxxxxxxxxxxxxxxxxxxxxxxxxxxxxxxxxxxxxxxxxxxxxxxxxxxxxxxxxxxxxxxxxxxxxxxxxxxxxxxxxxxxxxxxxxxxxxxxxxxxxxxxxxxxxxxxxxxxxxxxxxxxxxx' \
   -e LOG_FILE/data/bitwarden.log \
   -p 127.0.0.1:8080:80 \
   -v /vw-data/:/data/ \
  --restart=always  \
vaultwarden/server:latest
Parameters
Let me explain some parameters.
-pis the shortened form of--publish, which exposed a port inside the container to a port of the host.HOST_PORT:CONTAINER_PORTHere I bind it to
localhost:8080to avoid unfiltered access.-v, also known as--volume, links a directory of the host to some path of the container as if mounting an external drive to the docker.HOST_DIR:CONTAINER_DIRBoth the host and the container can read and write the volume, and the volume will not be affected when the container is destroyed.
--restart-alwaysmeans that it will always restart if it’s down.--nameis the name of the container, can be customized.-eintroduces some environmental variables.
Build on Your Own
If you want to build your own docker image to deploy, please check this page. But this is NOT recommended.
Compiling consumes a lot of time and resource, leaving a heavy load on your machine.
But anyway, here I give an example.
git clone https://github.com/dani-garcia/vaultwarden.git
cd vaultwarden
sudo docker build -t vaultwarden .

sudo docker run -d \
  --name=vaultwarden_built \
   -e WEBSOCKET_ENABLED=true \
   -e ADMIN_TOKEN='xxxxxxxxxxxxxxxxxxxxxxxxxxxxxxxxxxxxxxxxxxxxxxxxxxxxxxxxxxxxxxxxxxxxxxxxxxxxxxxxxxxxxxxxxxxxxxxxxxxxxxxxxxxxxxxxxxxxxxxxxxxxxxxxxxxxxxxxxxxxxxxxxxxxxxxxxxxxxxxxxxxxxxxxxxxxxxxxxxxxxxxxxxxxxxxxxxxxxxxxxxxxxxxxx' \
   -e LOG_FILE/data/bitwarden.log \
   -p 127.0.0.1:8080:80 \
   -v /vw-data/:/data/ \
  --restart=always \
vaultwarden:latest
Now it should be running well.
Set Name Resolution
Now that the service is up, you can expose your service to the Internet now.
Then add a DNS record so that bitwarden.example.com will resolve.
Remember to switch on the “Proxy”. Cloudflare will help you hide origin IP, handle threats and accelerate loading.
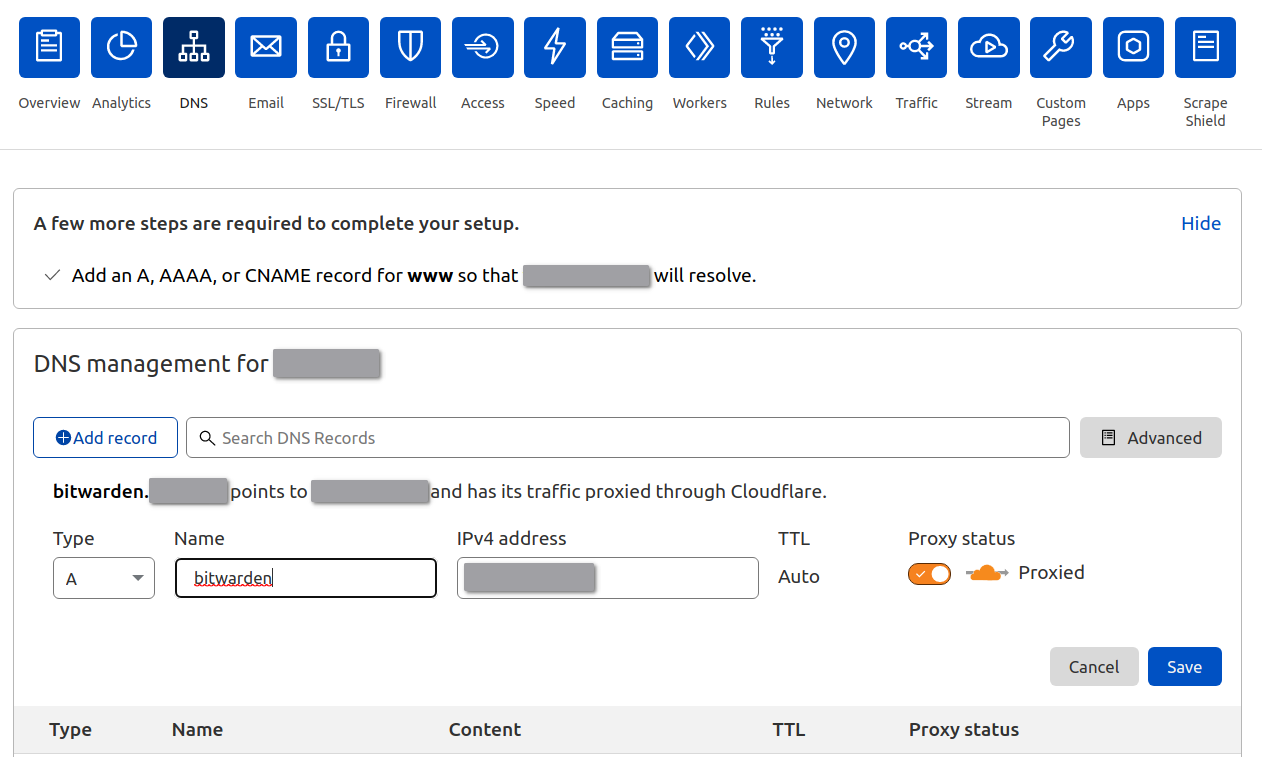
if you do not have a static IP address, then you may add a CNAME record to bind it to your DDNS domain. I guess you know well about this if you are using such service.
…
I know some of you may worry about the security, as we all know that, Cloudflare’s CDN have access to our requests and the server’s responses.
But don’t worry. According to the documentation of Bitwarden, all of your data are already processed before being sent to the server, and TLS is only an extra layer of protection.
All data on the cloud is encrypted or hashed, so it’s im possible to see the raw data on either way, so uploading and downloading are safe all the time. Cloudflare won’t be able to see your raw data or decrypt any stream, relax.
The only way to access the raw data is in your hand, the master password.
Make it strong enough to survive brute force, that’s the most important thing.
Set up Your Vault
You can also set things up using the configuration file config.json.
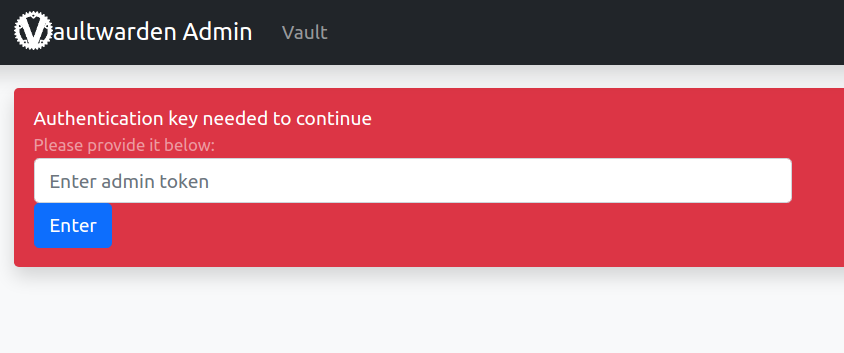
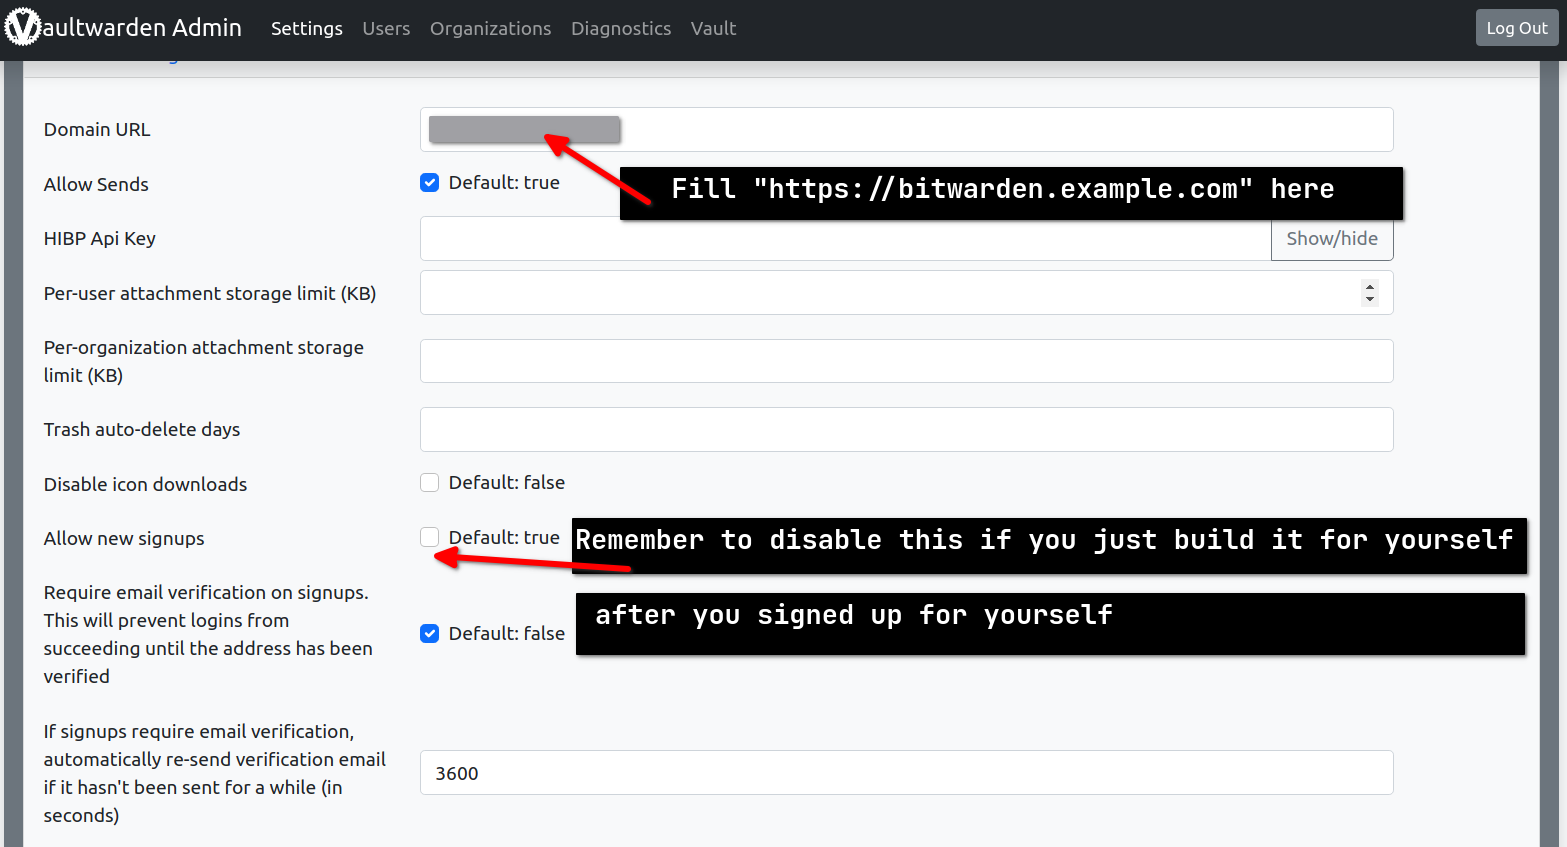
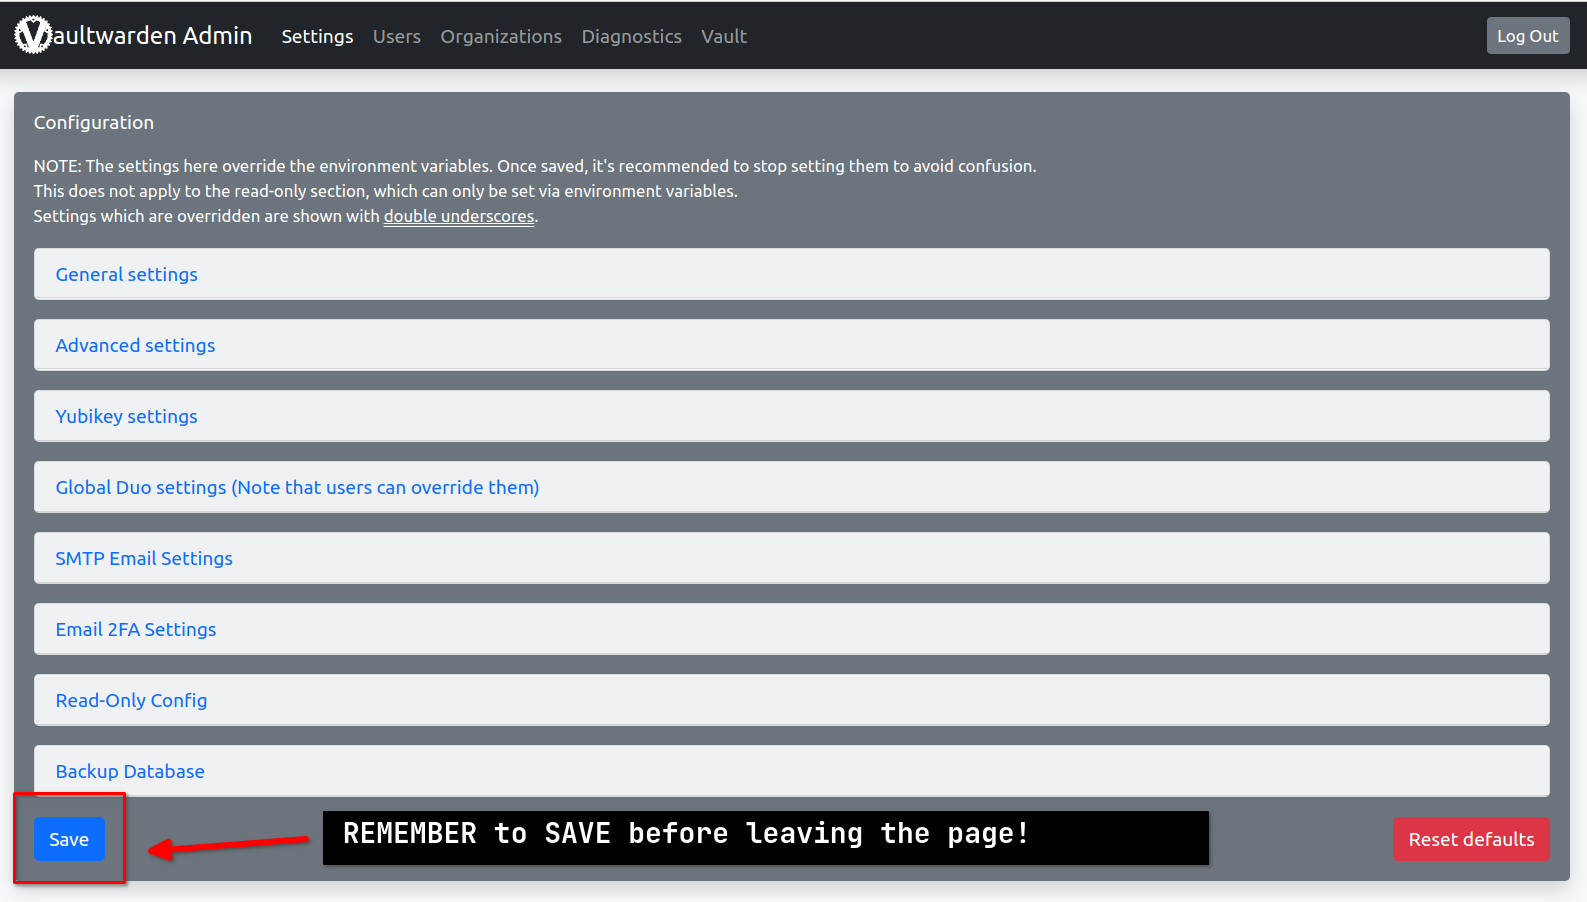
Go to https://bitwarden.example.com/admin and log in with the ADMIN_TOKEN you previously set.
Limit Signups
If you don’t want others to use your vault, then it’s better to disable new signups in admin panel.
Untick Allow new signups to avoid unwanted registration.
(Optional) Configure SMTP Service
Configure SMTP servers for signup verification and password hint.
Yandex 360 is a good choice. It has a free plan which is already enough for us to use. Of course, that’s another story, very easy, though.
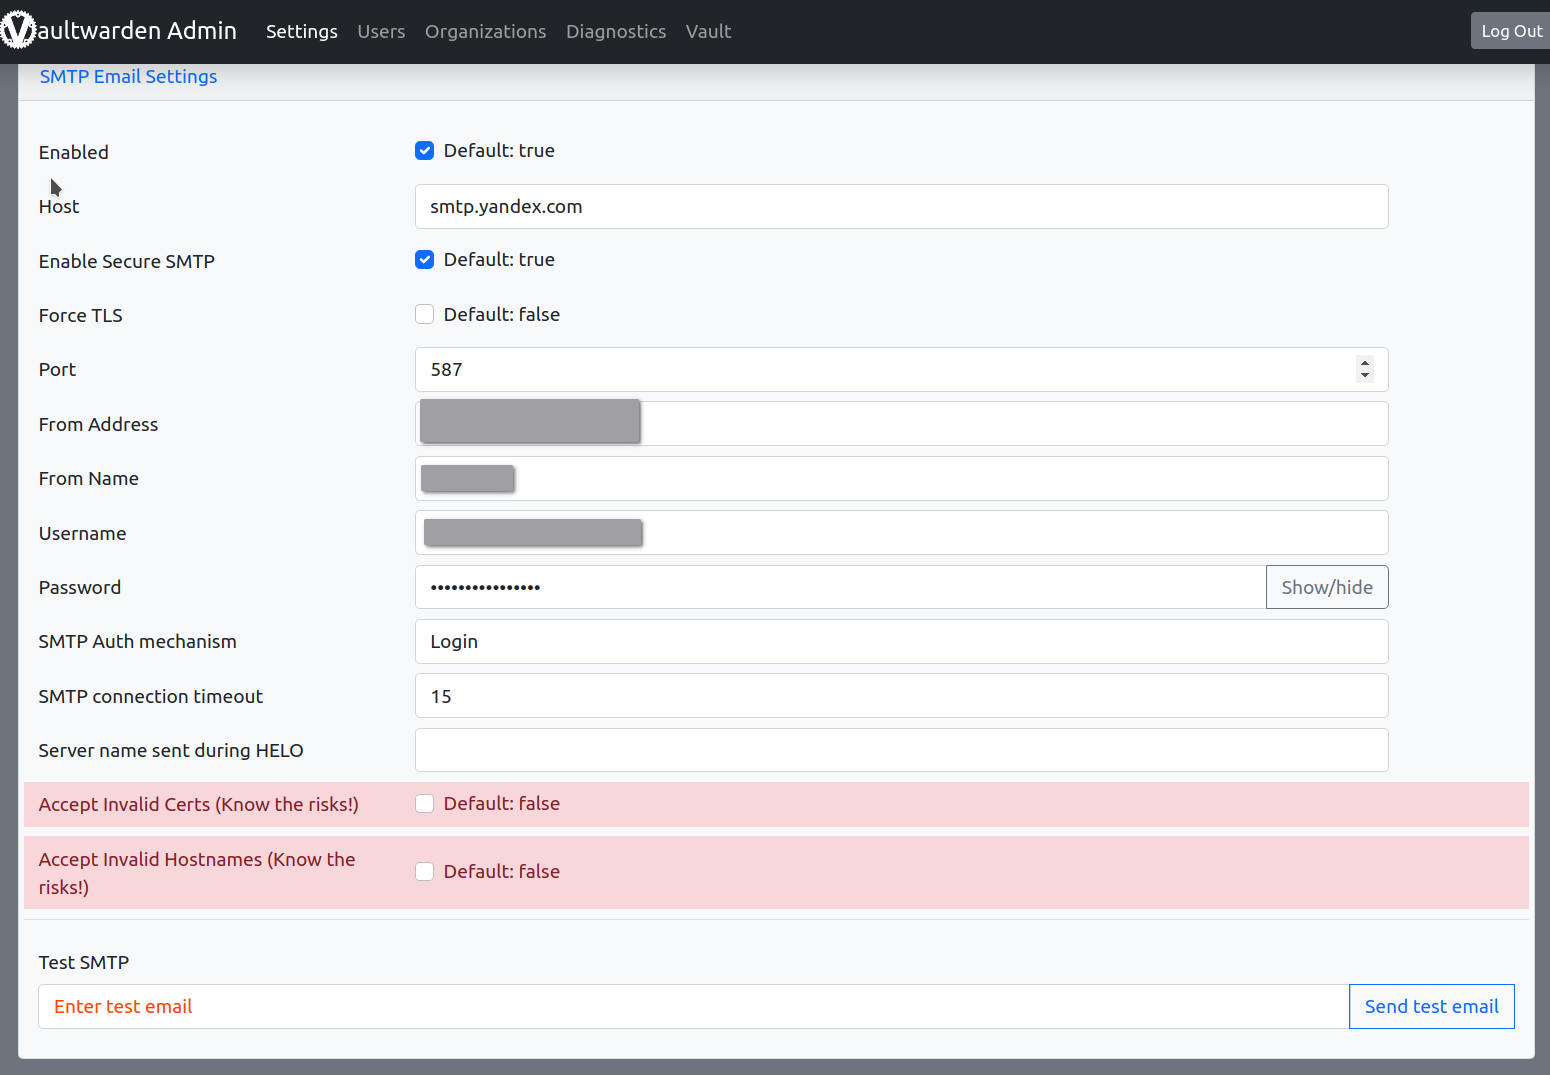
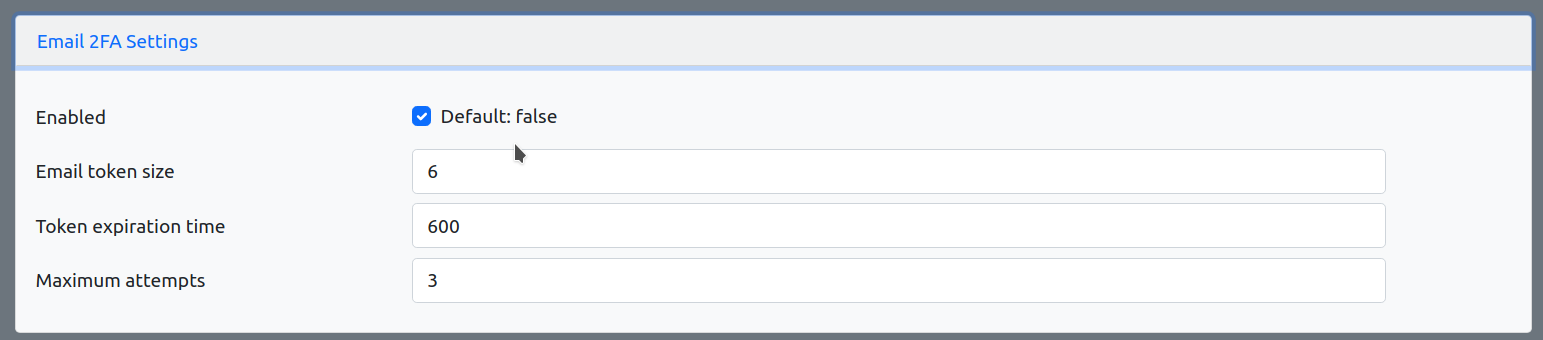
You can enable Email 2FA too.
SAVE YOUR SETTING
REMEMBER TO SAVE YOUR SETTING before leaving the page!
REMEMBER TO SAVE YOUR SETTING before leaving the page!
REMEMBER TO SAVE YOUR SETTING before leaving the page!
Use Invite
If you want to have someone else here, why not invite one user via admin panel?
Go to Users and type in the email. In this way, a new account will be added in your database. Then the new user can sign up and ignore the limitations of Allow new signups because the account is already in the database.
Remember to remove any user that you can’t identify.
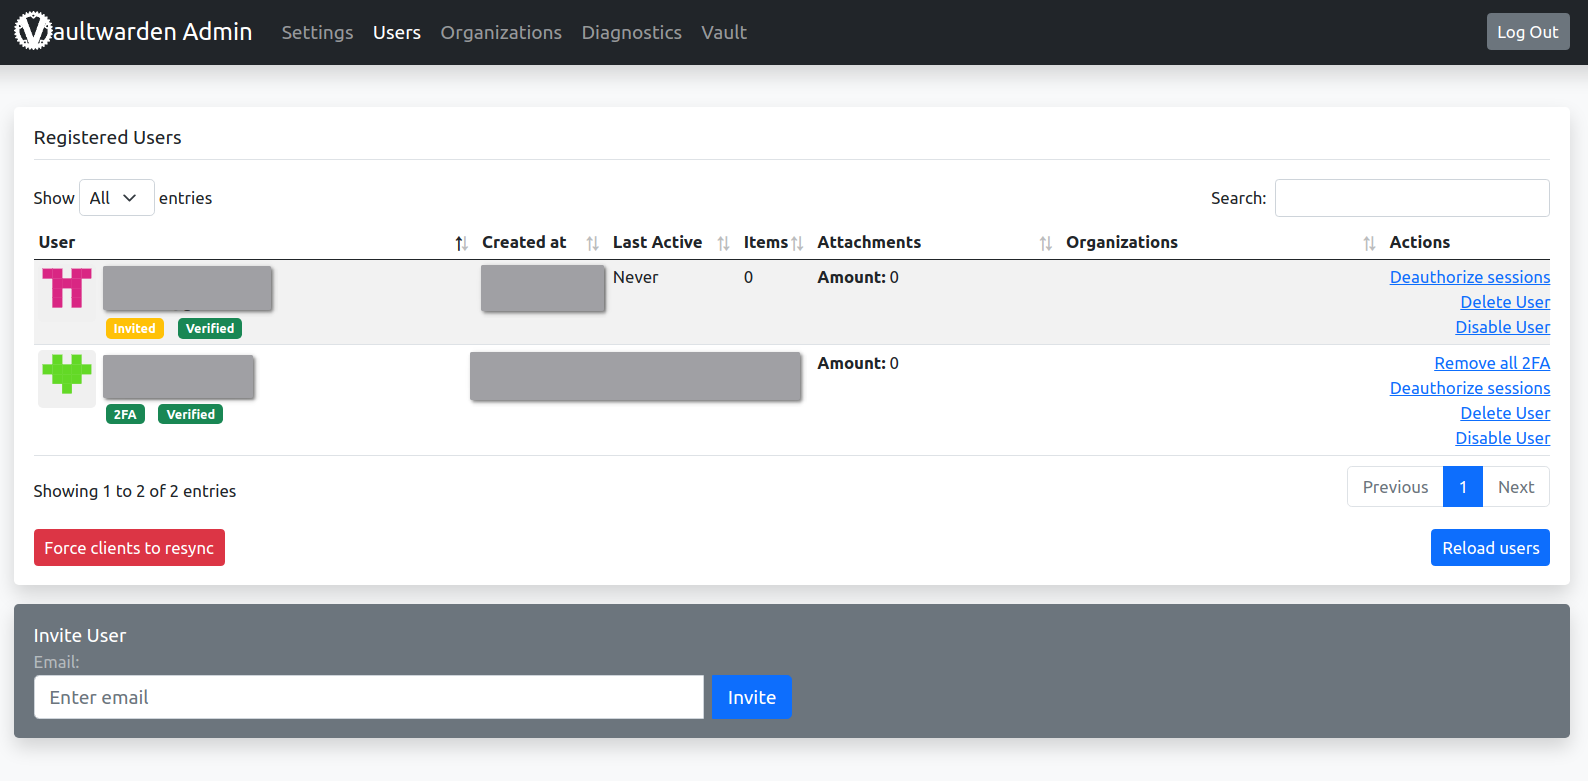
After they created the account using the exact email, they will get in and the Invited tag will be removed.
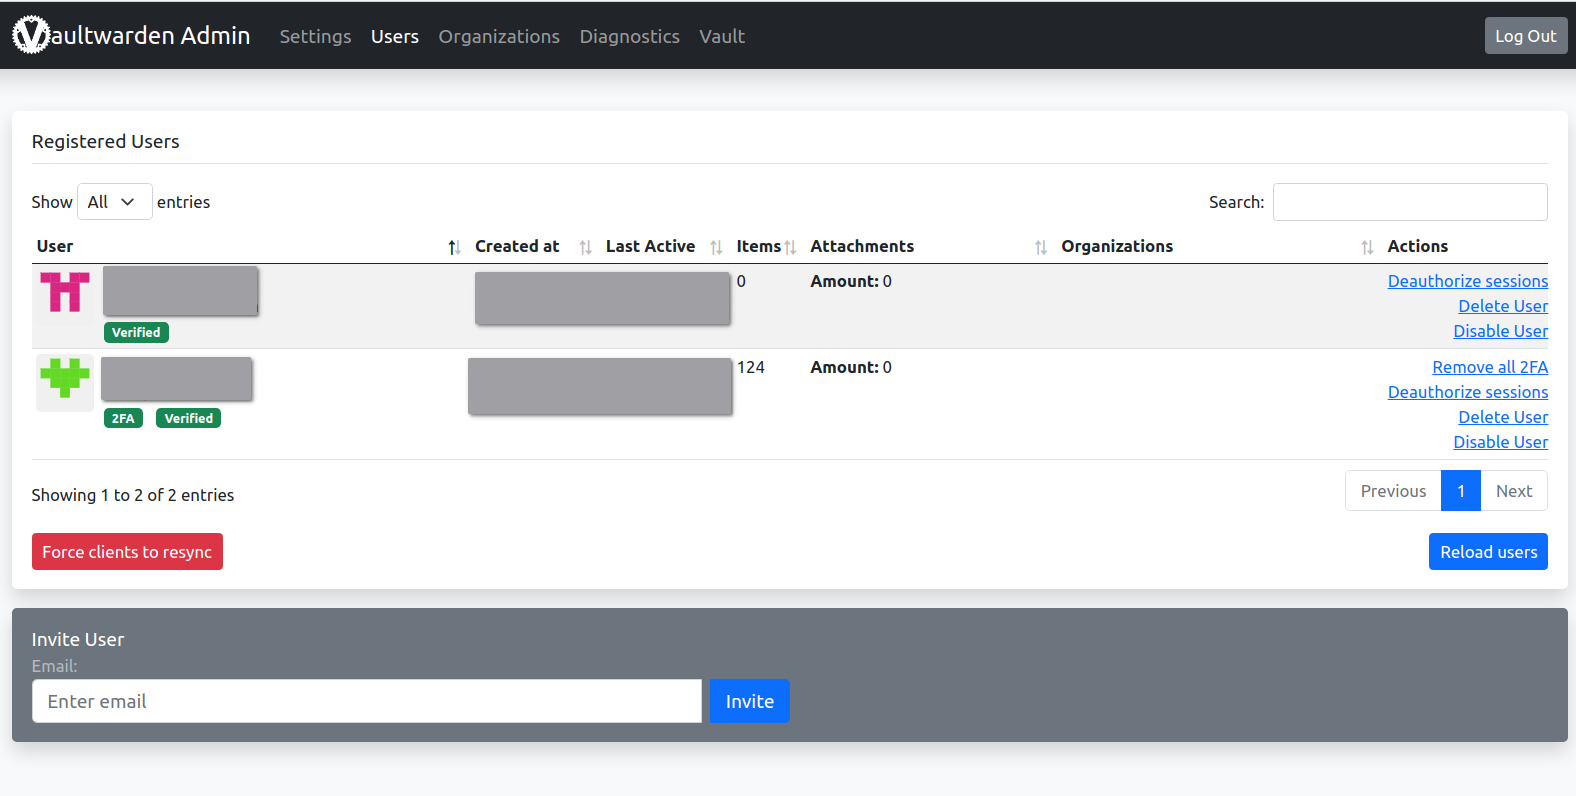
In this way, you can add new users safely, including yourself.
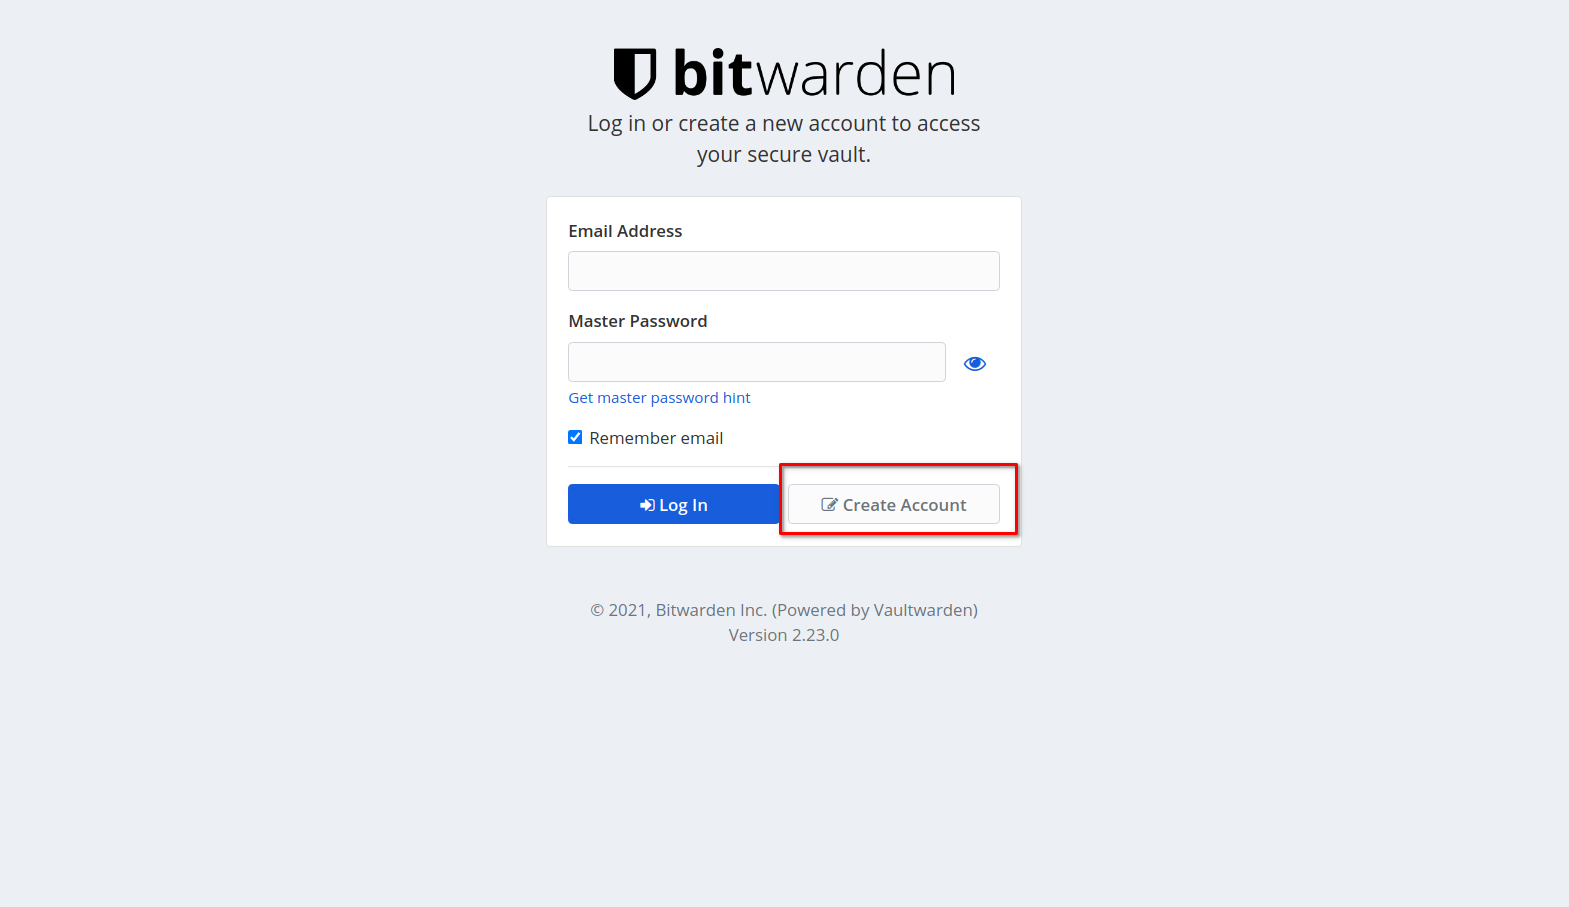
Register A New Account
Go to bitwarden.example.com and register your account now.
Remember your password! There’s no way getting it back or resetting it. If you forget it, the only thing you can do is to delete this account and register a new one.
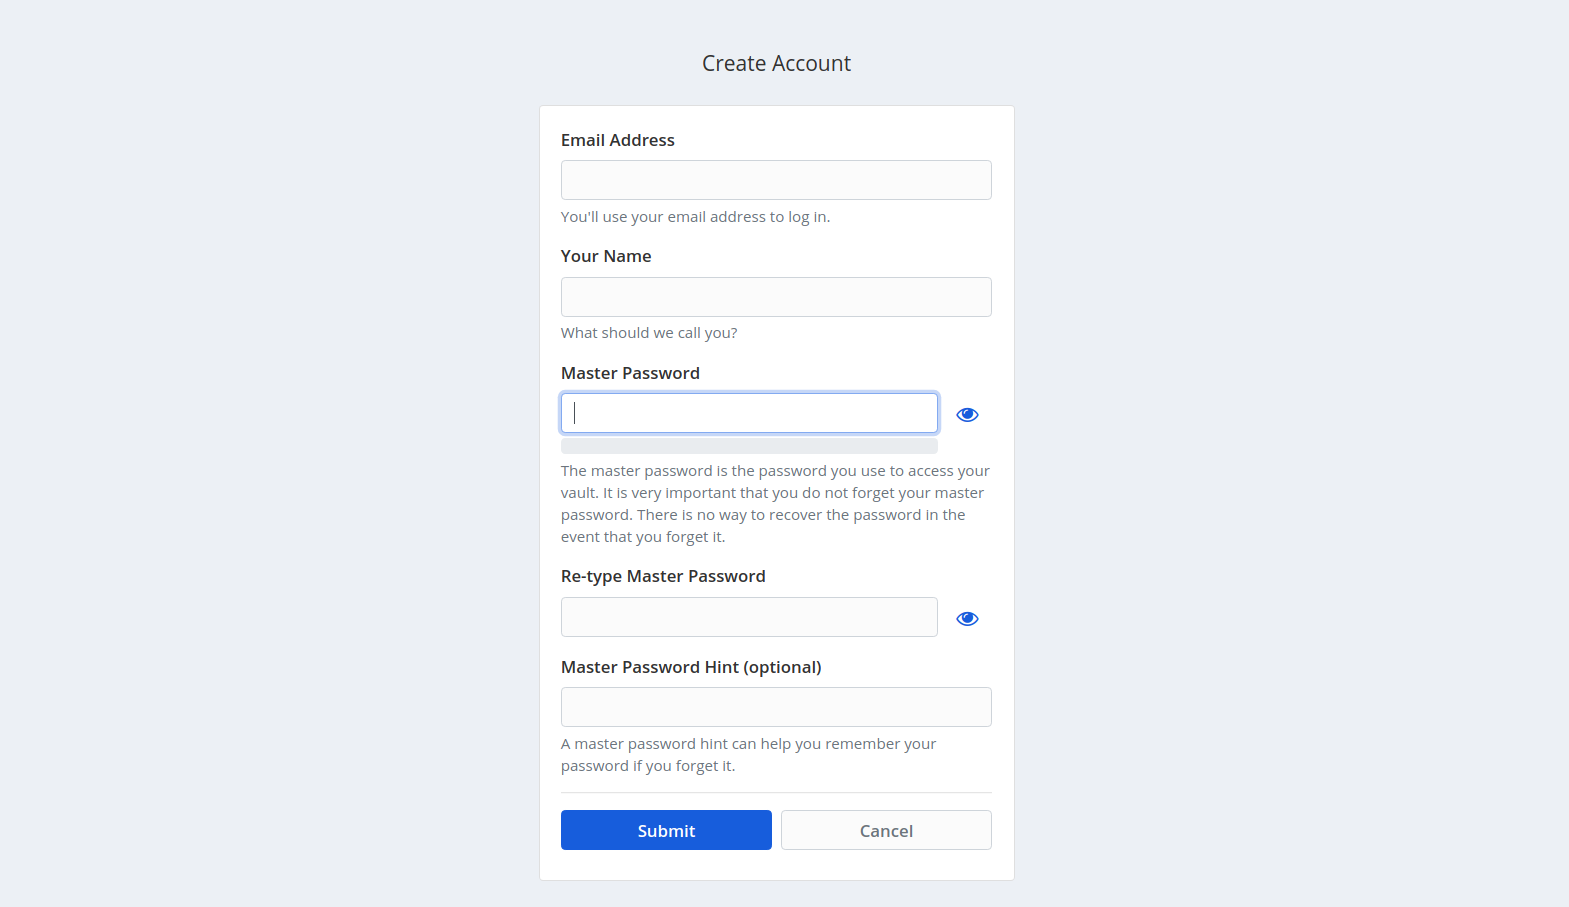
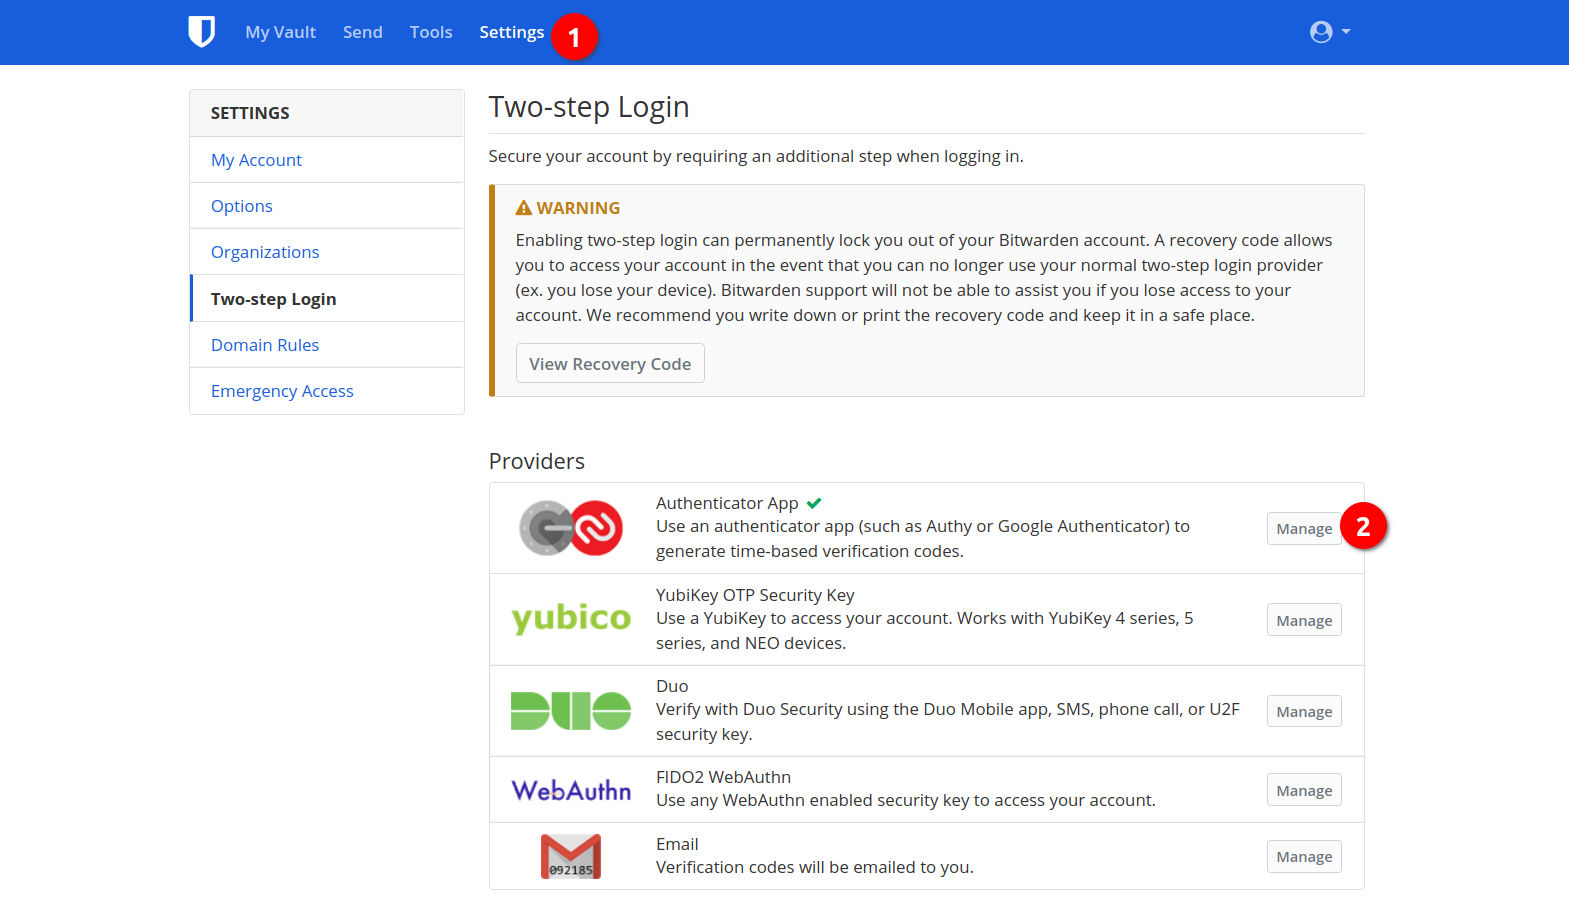
Setup 2FA
Then go to Settings -> Two-step Login and setup Authenticator App for 2FA. Based on TOTP, it supports a lot of authenticator apps. There are some good applications and it is NOT recommended to use Authy.
For Android, their is one app called andOTP, which is available on Google Play and F-Droid.
For Linux, there’s a GTK application called OTPClient.
Backup & Restore
You can keep a full backup of your vault, in case your server fail or lose data, like what happened to OVH…

Backup
You can backup the database using the admin panel, The backup database will be named db_YYYYMMDD_HHMMSS.sqlite3.
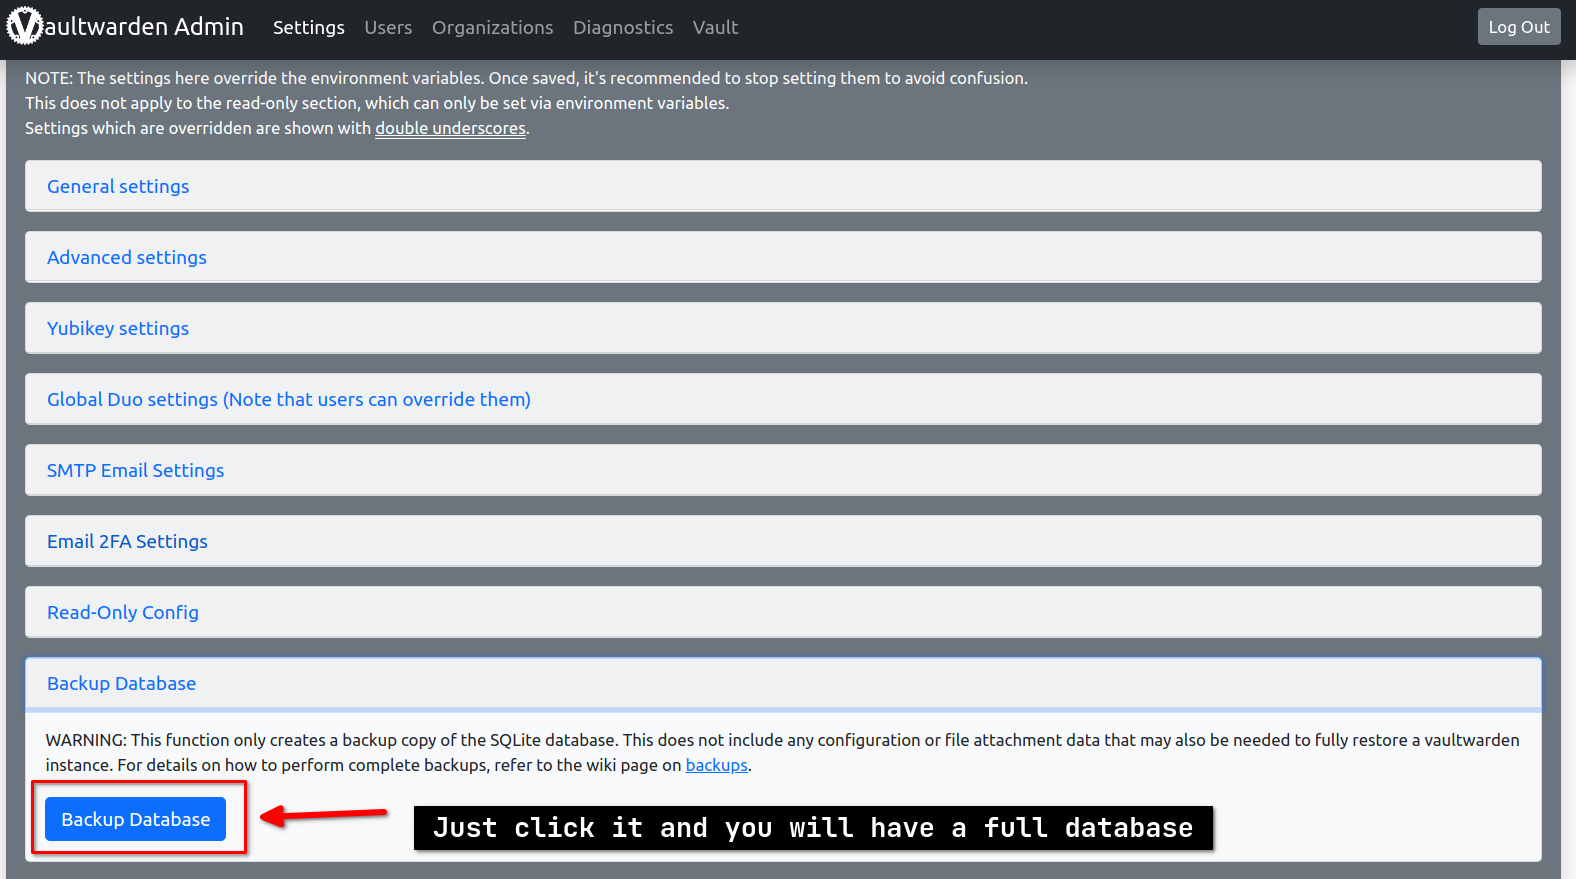
You can do this via command line too. Referencesqlite3 ./vw-data/db.sqlite3 "VACUUM INTO './vw-data/db_$(date '+%Y%m%d-%H%M').sqlite3'"
This database doesn’t include vault configuration or icons, just saved passwords and notes. Attachments are in /attachments, it’s compulsory to backup this folder if you have attached anything to your vault item(s).
Sends are stored outside the database, in /sends.
w/ Compression
Just archive the folder, like
tar --zstd -cvf backup.tar.zst ./vw-dataIf you just need a minimum backup, then you can go on this way:
tar --zstd -cvf 'vw-data.tar.zst' \
    /vw-data/attachments \
    /vw-data/config.json \
    /vw-data/db*.sqlite3 \
    /vw-data/rsa*
And backup /sends separately.
tar --zstd -cvf 'vw-data-sends.tar.zst' /vw-data/sendsThen transmit it to your local client. It’s highly recommended to transmit using a secure protocol and save it directly into an encrypted place. For example, you can create an encrypted volume using veracrypt and then mount it. Open terminal directly in the encrypted directory or use cd. Then just download it. You can do this using rsync or scp via SSH.
w/o Compression
If you don’t want to compress the folder, you can skip the step.
Replace $PORT with your ssh port.
A minimum backup looks like this:
rsync -av --progress \
    --include "attachments" \
    --include "config.json" \
    --include "db*.sqlite3" \
    --include "rsa*" \
    --exclude "*" \
    -e "ssh -p$PORT" user@hostname:/vw-data/ vw-data
Treat /sends separately, again.
rsync -av --progress -e "ssh -p$PORT" user@hostname:/vw-data/sends vw-data/If you want to do a full backup:
rsync -av --progress -e "ssh -p$PORT" user@hostname:/vw-data/ vw-dataThis line of command will sync everything recursively in the folder /vw-data on the host and put them in the folder vw-data in your local machine.
Save your data
Dismount your device and save it somewhere safe. You can duplicate the encrypted volume and spread it where you have full control.
Restore
It is simple too. Just upload it securely.
scp backup.tar username@host:~/backup.tar Then extract it to the place you want it to be.
tar -C / --zstd -xvf backup.tar.zstOptionally, you can rename the backup database db_YYYYMMDD_HHMMSS.sqlite3 to db.sqlite3 to revert your database to that timestamp.
As for a smaller upload:
rsync -av --progress \
    --include "attachments" \
    --include "config.json" \
    --include "db.sqlite3" \
    --include "rsa*" \
    --exclude "*" \
    -e "ssh -p$PORT" vw-data/ user@hostname:/
If you upload the whole directory:
rsync -av --progress -e "ssh -p$PORT" vw-data user@hostname:/This time the command looks kind of different. The folder vw-data on you local device will be fully duplicated onto your host in the directory /.
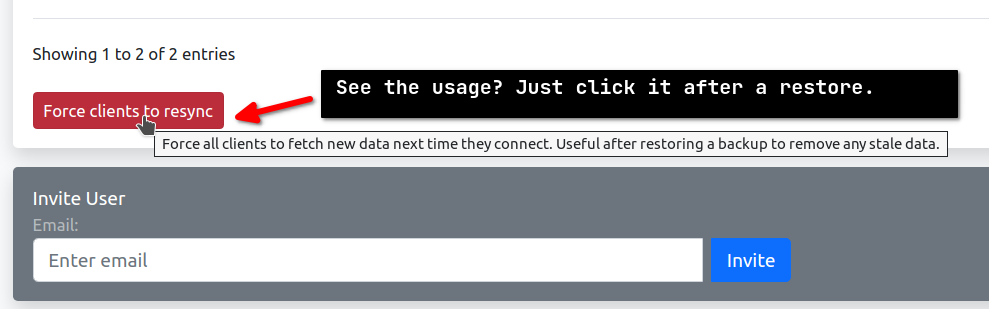
Require a Force Resync
Of course, it’s better to ask clients to synchronize after a restore.
So go to the admin panel, choose Users, and set a force resync.
Summary
That’s what I have learned about the basic deployment and maintenance of this powerful vault.
As for detailed usages, it doesn’t bother to explore on your own.
Have fun.
Acknowledgement
Thank ous50 again for his tutorial. I had a lot of questions while deploying the server, without his patient help, I couldn’t have made this.
And thanks billchenchina for his suggestion on the outline of the articles.